ABOUT THE ARTIST
Reese Hausman is a third-year Games + Simulation major at Miami University with a minor in Studio Art. Her passions lie in the intersection of art and technology to create an immersive narrative experience, specifically through the lens of character design. Her greatest strengths are her organizational skills, creative curiosity, and iterative thinking.
SPRING 2025
IMS/ART 218 PORTFOLIO
Miami University's 3D Shading and Texturing course teaches industry-standard software and the workflow required to create materials, textures, and shaders for physically based render systems. The cumulative environment below demonstrates my development throughout the class.

Final Diorama

VFX

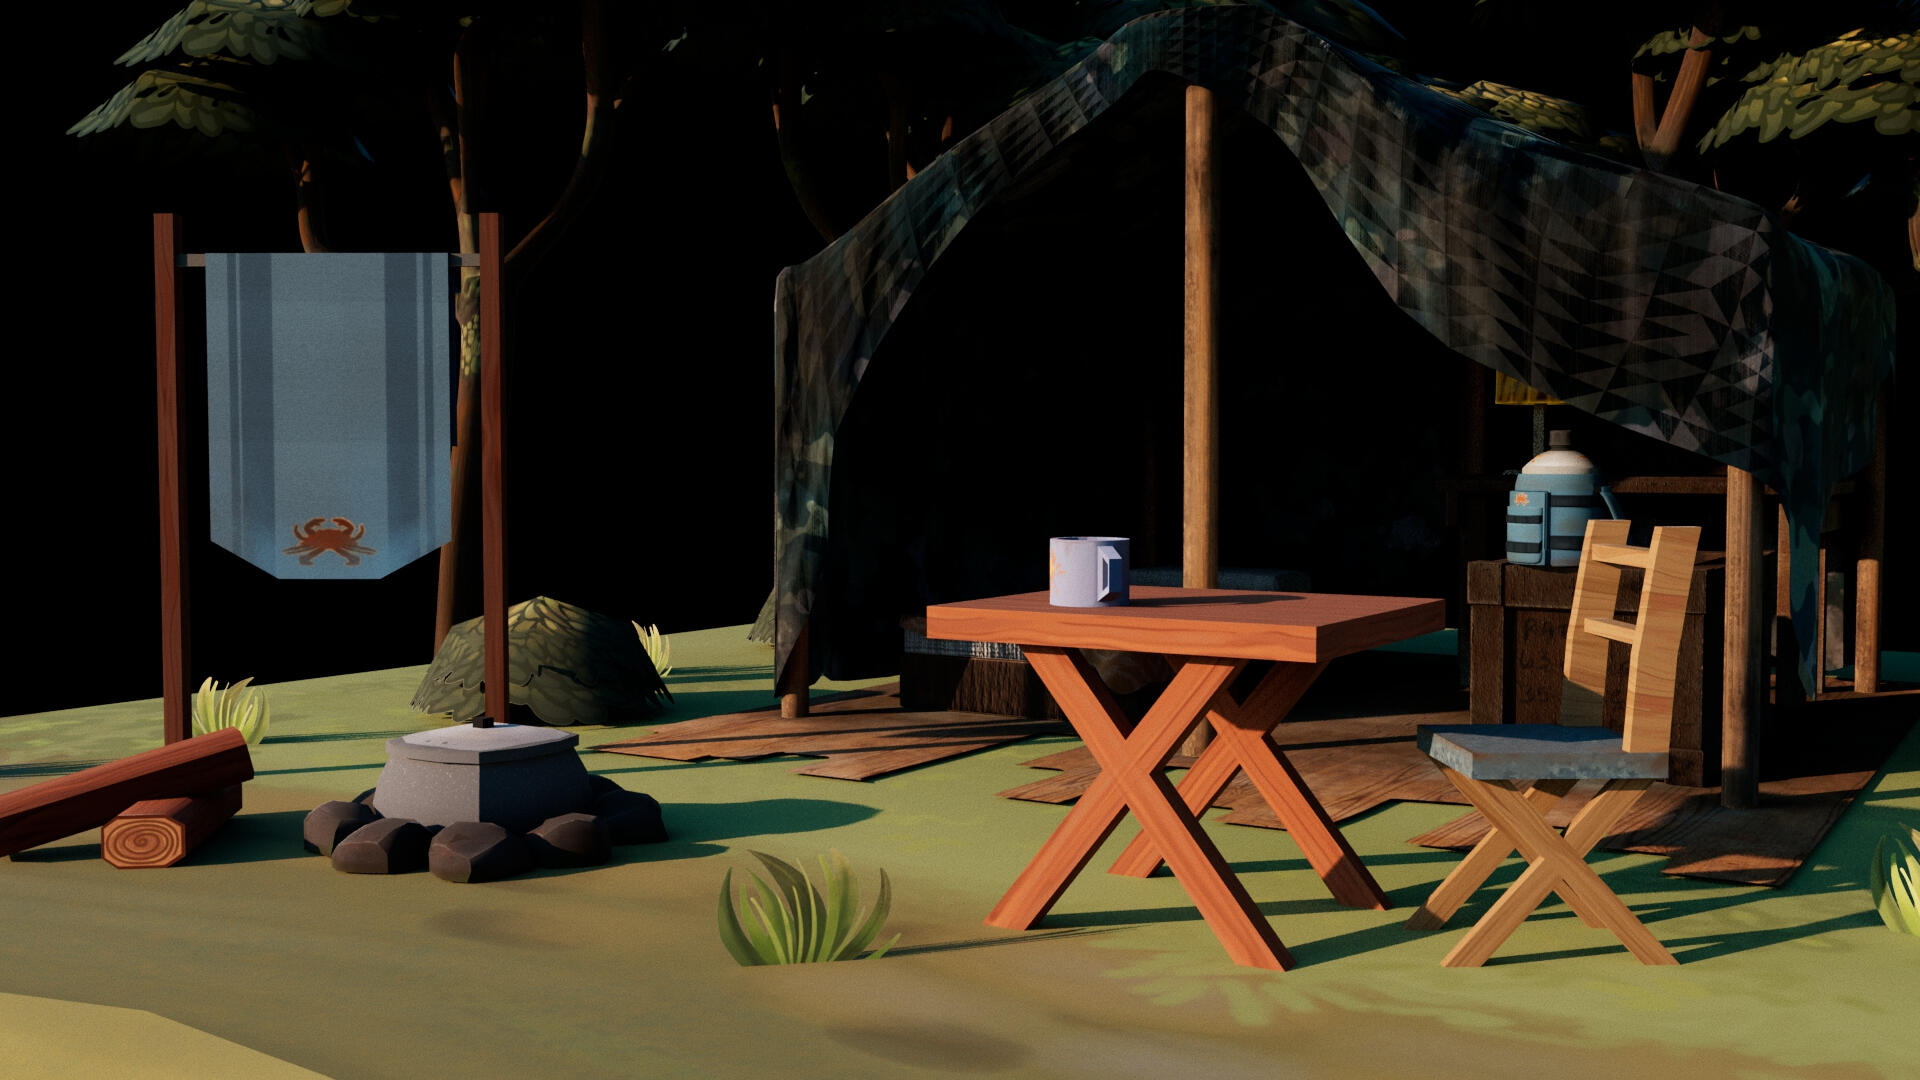
Environment

House

Tree
Container
FALL 2024
IMS/ART 215 PORTFOLIO
Miami University's 3D Digital Sculpting course teaches industry-standard software and best practices for 3D asset creation in video games, animation, and other media. The six projects shown below demonstrate my development as I progressed through the class.
Character Model
Anatomical Study
Prop Model
Environment Asset
Animal Anatomy
Envrionment Prop
february 2025 - project 1
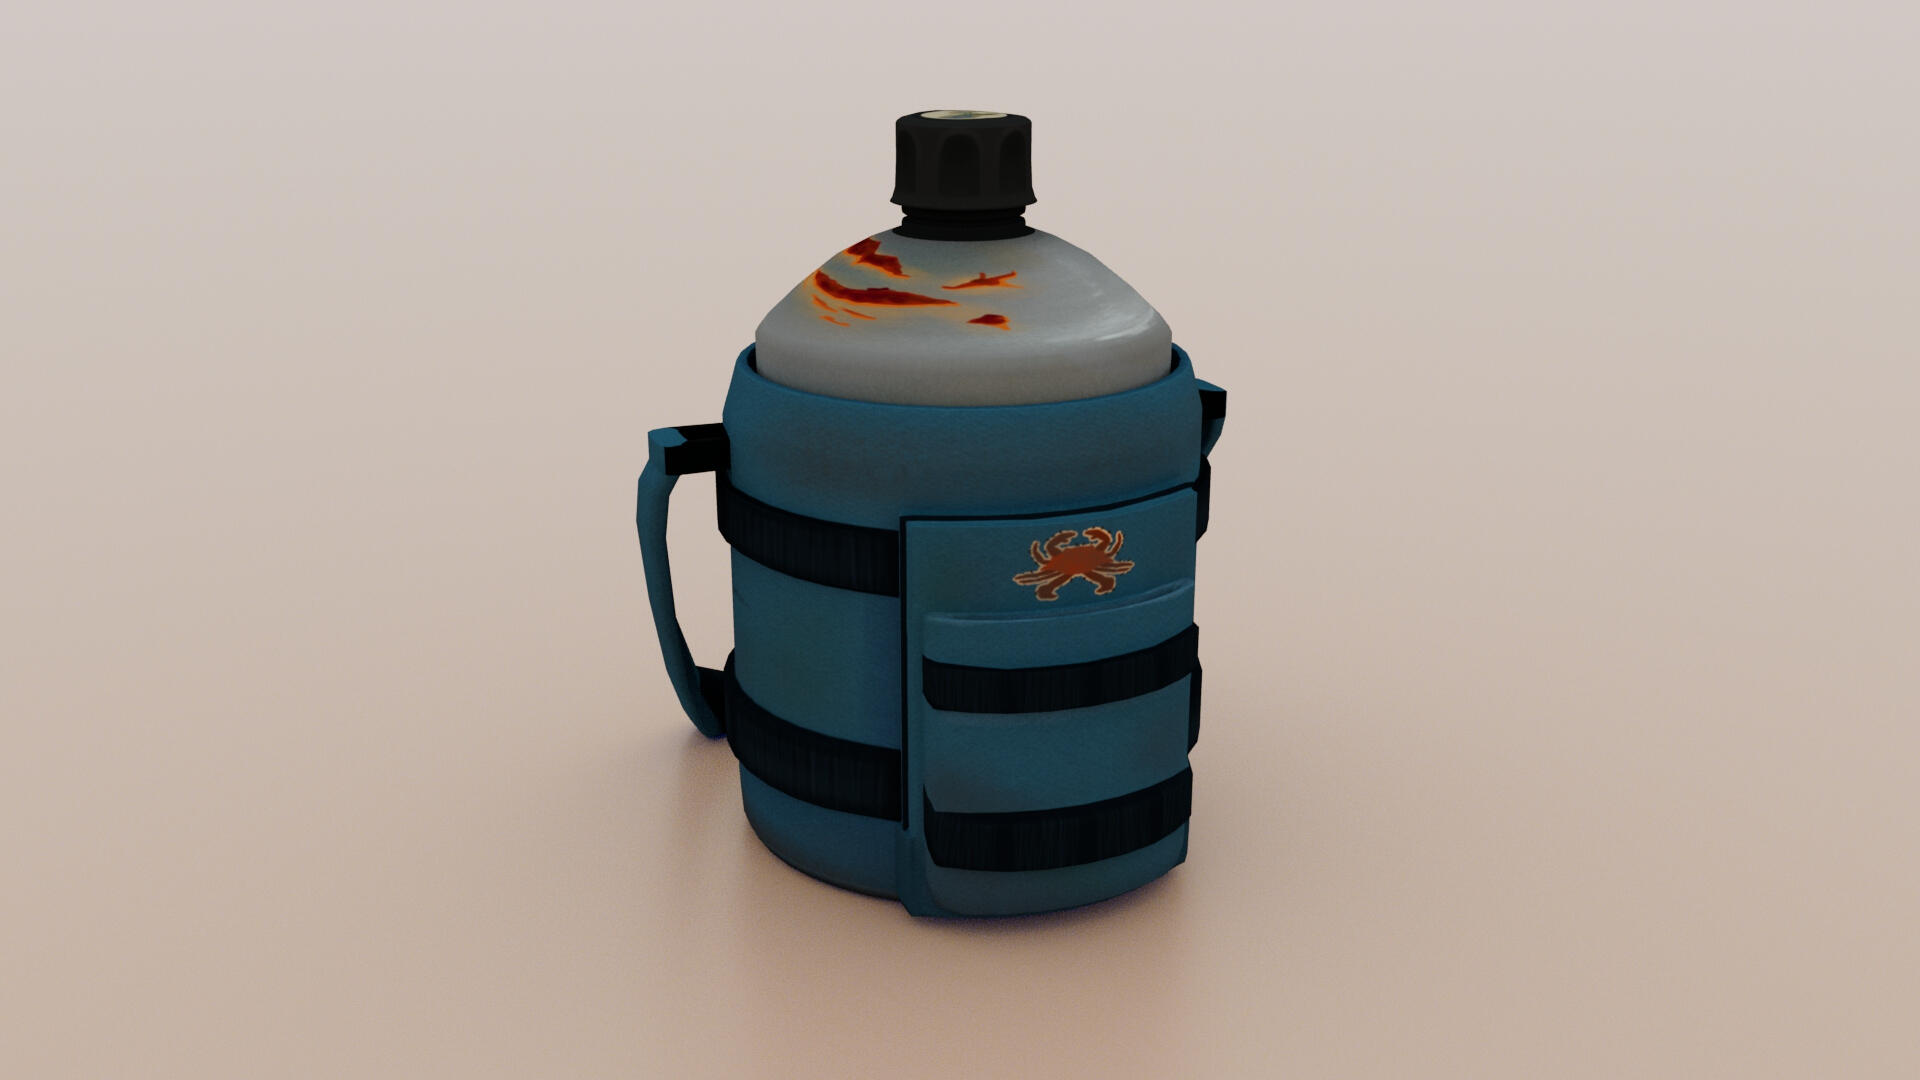
Container
Programs Used: MAYA, PROCREATE

process
Gather references.
Model geometry in Maya.
UV unwrap in Maya.
Create texture maps in Procreate.
Export and apply texture maps to Maya model.
Assemble scene & create renders in Maya.
From the start of this cumulative project, I knew I wanted to create a home environment for a character model I was working on simultaneously. Therefore, the main goal of this water bottle was storytelling. The jug should be portable, since my character is nomadic, and look rusted, since the character moves around a lot in a swampy biome. The crab insignia relates to their military regiment, and the sticker on top relates to their beliefs about sustainability.
This was the last project I would fully texture in Procreate just by the UV image alone. I realized how tedious it was to keep switching between software to check for distortion or blurriness, which prompted me to look into Procreate's 3D capabilities for future projects.
february 2025 - project 2
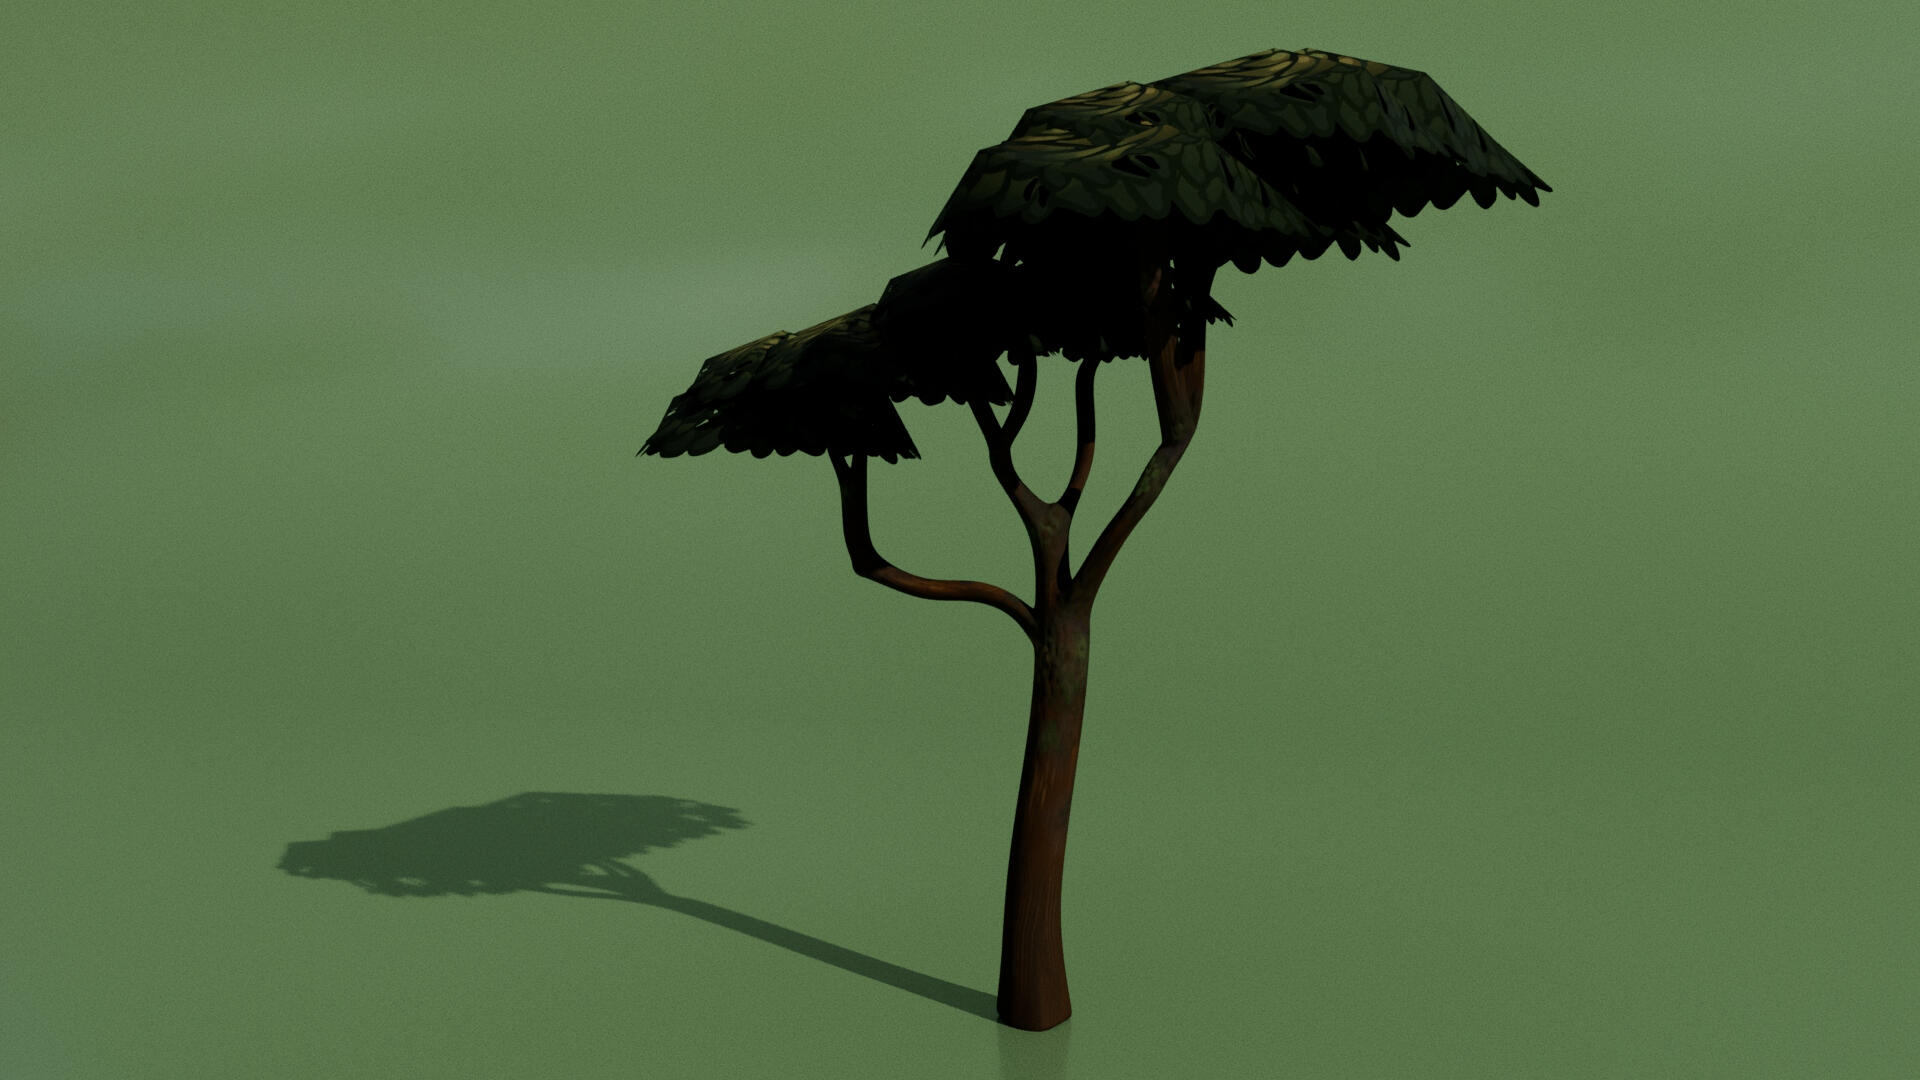
Organic Vegetation
Programs Used: MAYA, ZBRUSH, PROCREATE

process
Gather references.
Model geometry in Maya, UV unwrap, and export.
Sculpt in ZBrush.
Paint in ZBrush, export to Procreate to refine textures.
Export and apply texture maps to Maya model.
Assemble scene & create renders in Maya.
Thematically, this tree relates to the Scalesia tree of the Galápagos Islands, where my character lives. This project would be my second time modeling a tree, and was slightly challenging as organic objects often are. I textured and painted it in ZBrush, but I didn't love the feel of ZBrush's paintbrushes, so I would refine the textures by exporting the UV map into Procreate. The biggest thing I learned from this experience was how to use masking to make objects transparent in the Arnold Renderer, which I did to add some dimensionality to the leaves.
march 2025 - project 3
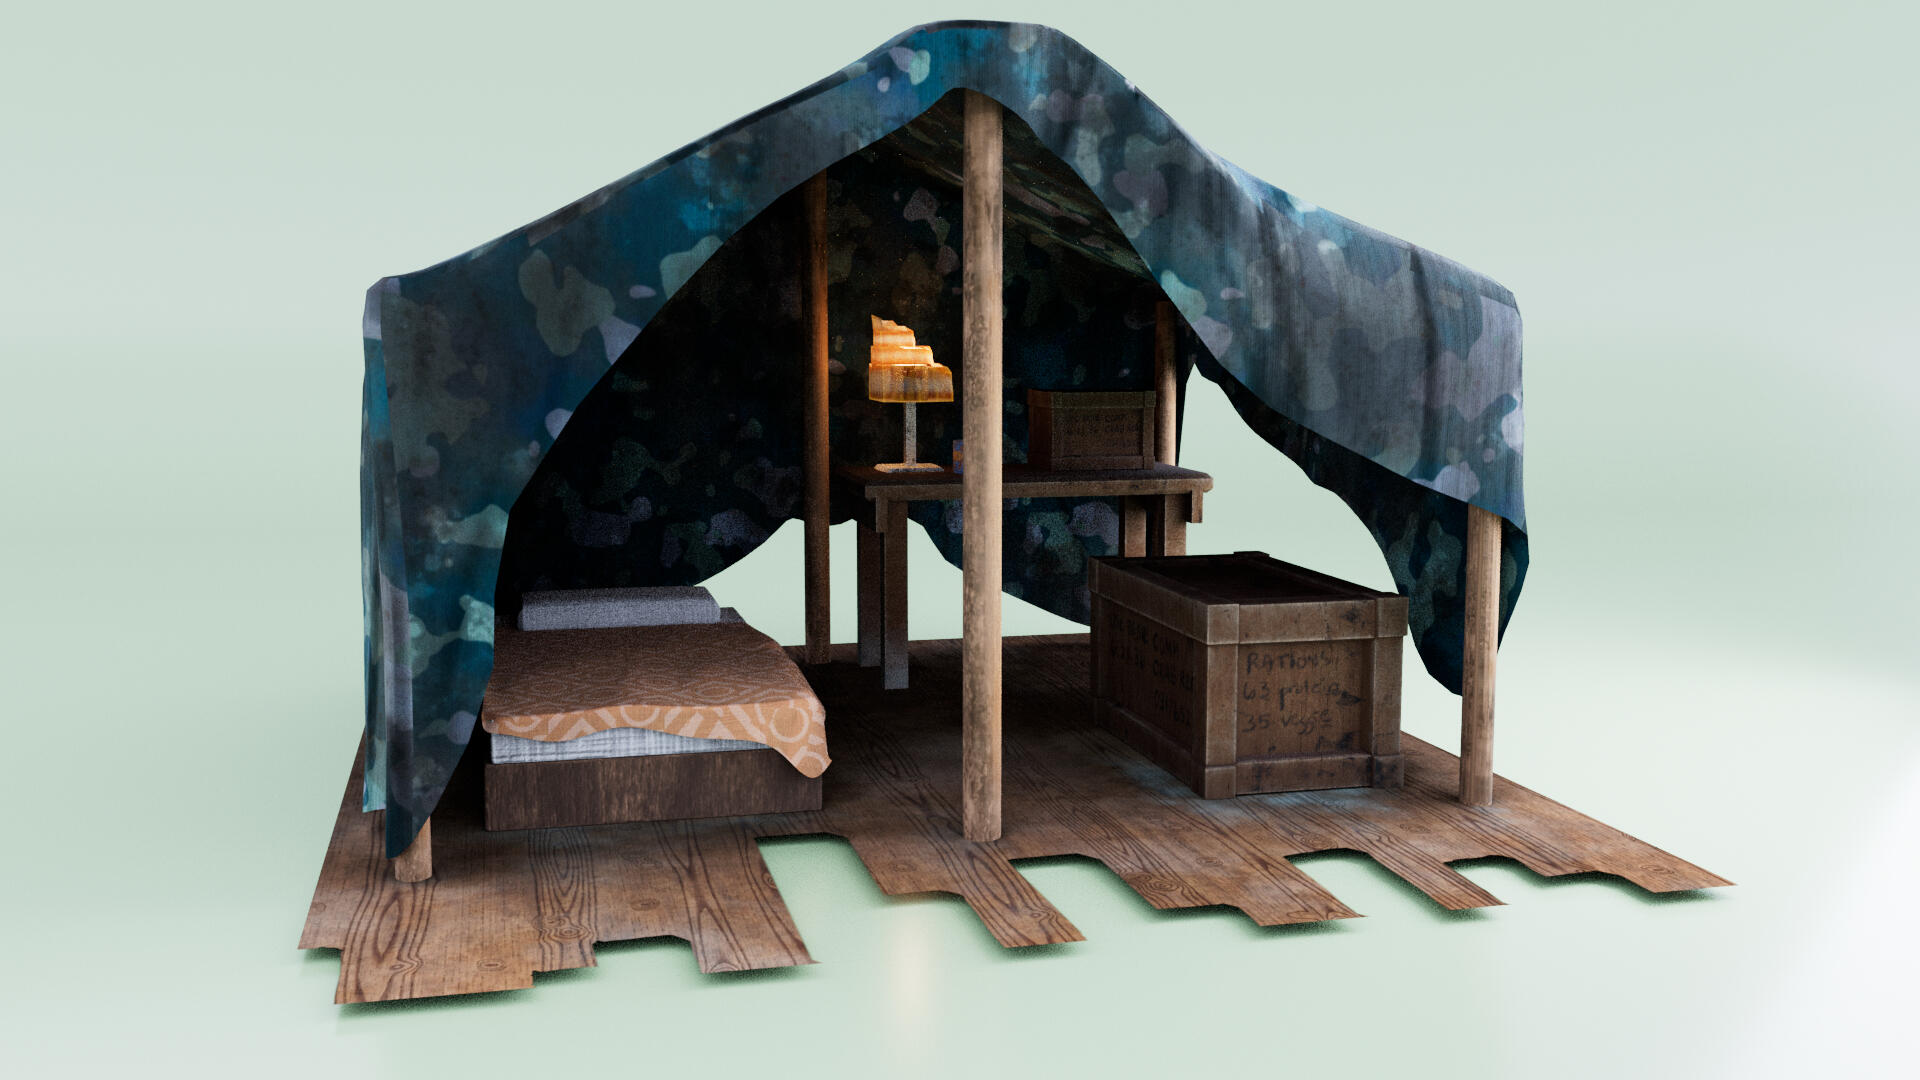
House
Programs Used: MAYA, SUBSTANCE PAINTER

process
Gather references.
Model geometry in Maya, UV unwrap, and export.
Texture in Substance Painter.
Export and apply texture maps to Maya model.
Assemble scene & create renders in Maya.
I utilized military imagery, such as camo patterns or food rations, to emphasize my character's lifestyle. Most of my time modeling was spent on manually hand-crafting the draping tarp and bed blanket, as I had a blast thinking about how gravity would affect these fabrics. From there, I mostly drag-and-dropped textures from Substance Painter with some minor adjustments and painting on top. This would prove to be a poor time-saving tactic, since I would have to re-texture some of the wood structures to better fit my painterly art style associated with my container, tree, and, later, my props and character.
march 2025 - project 4
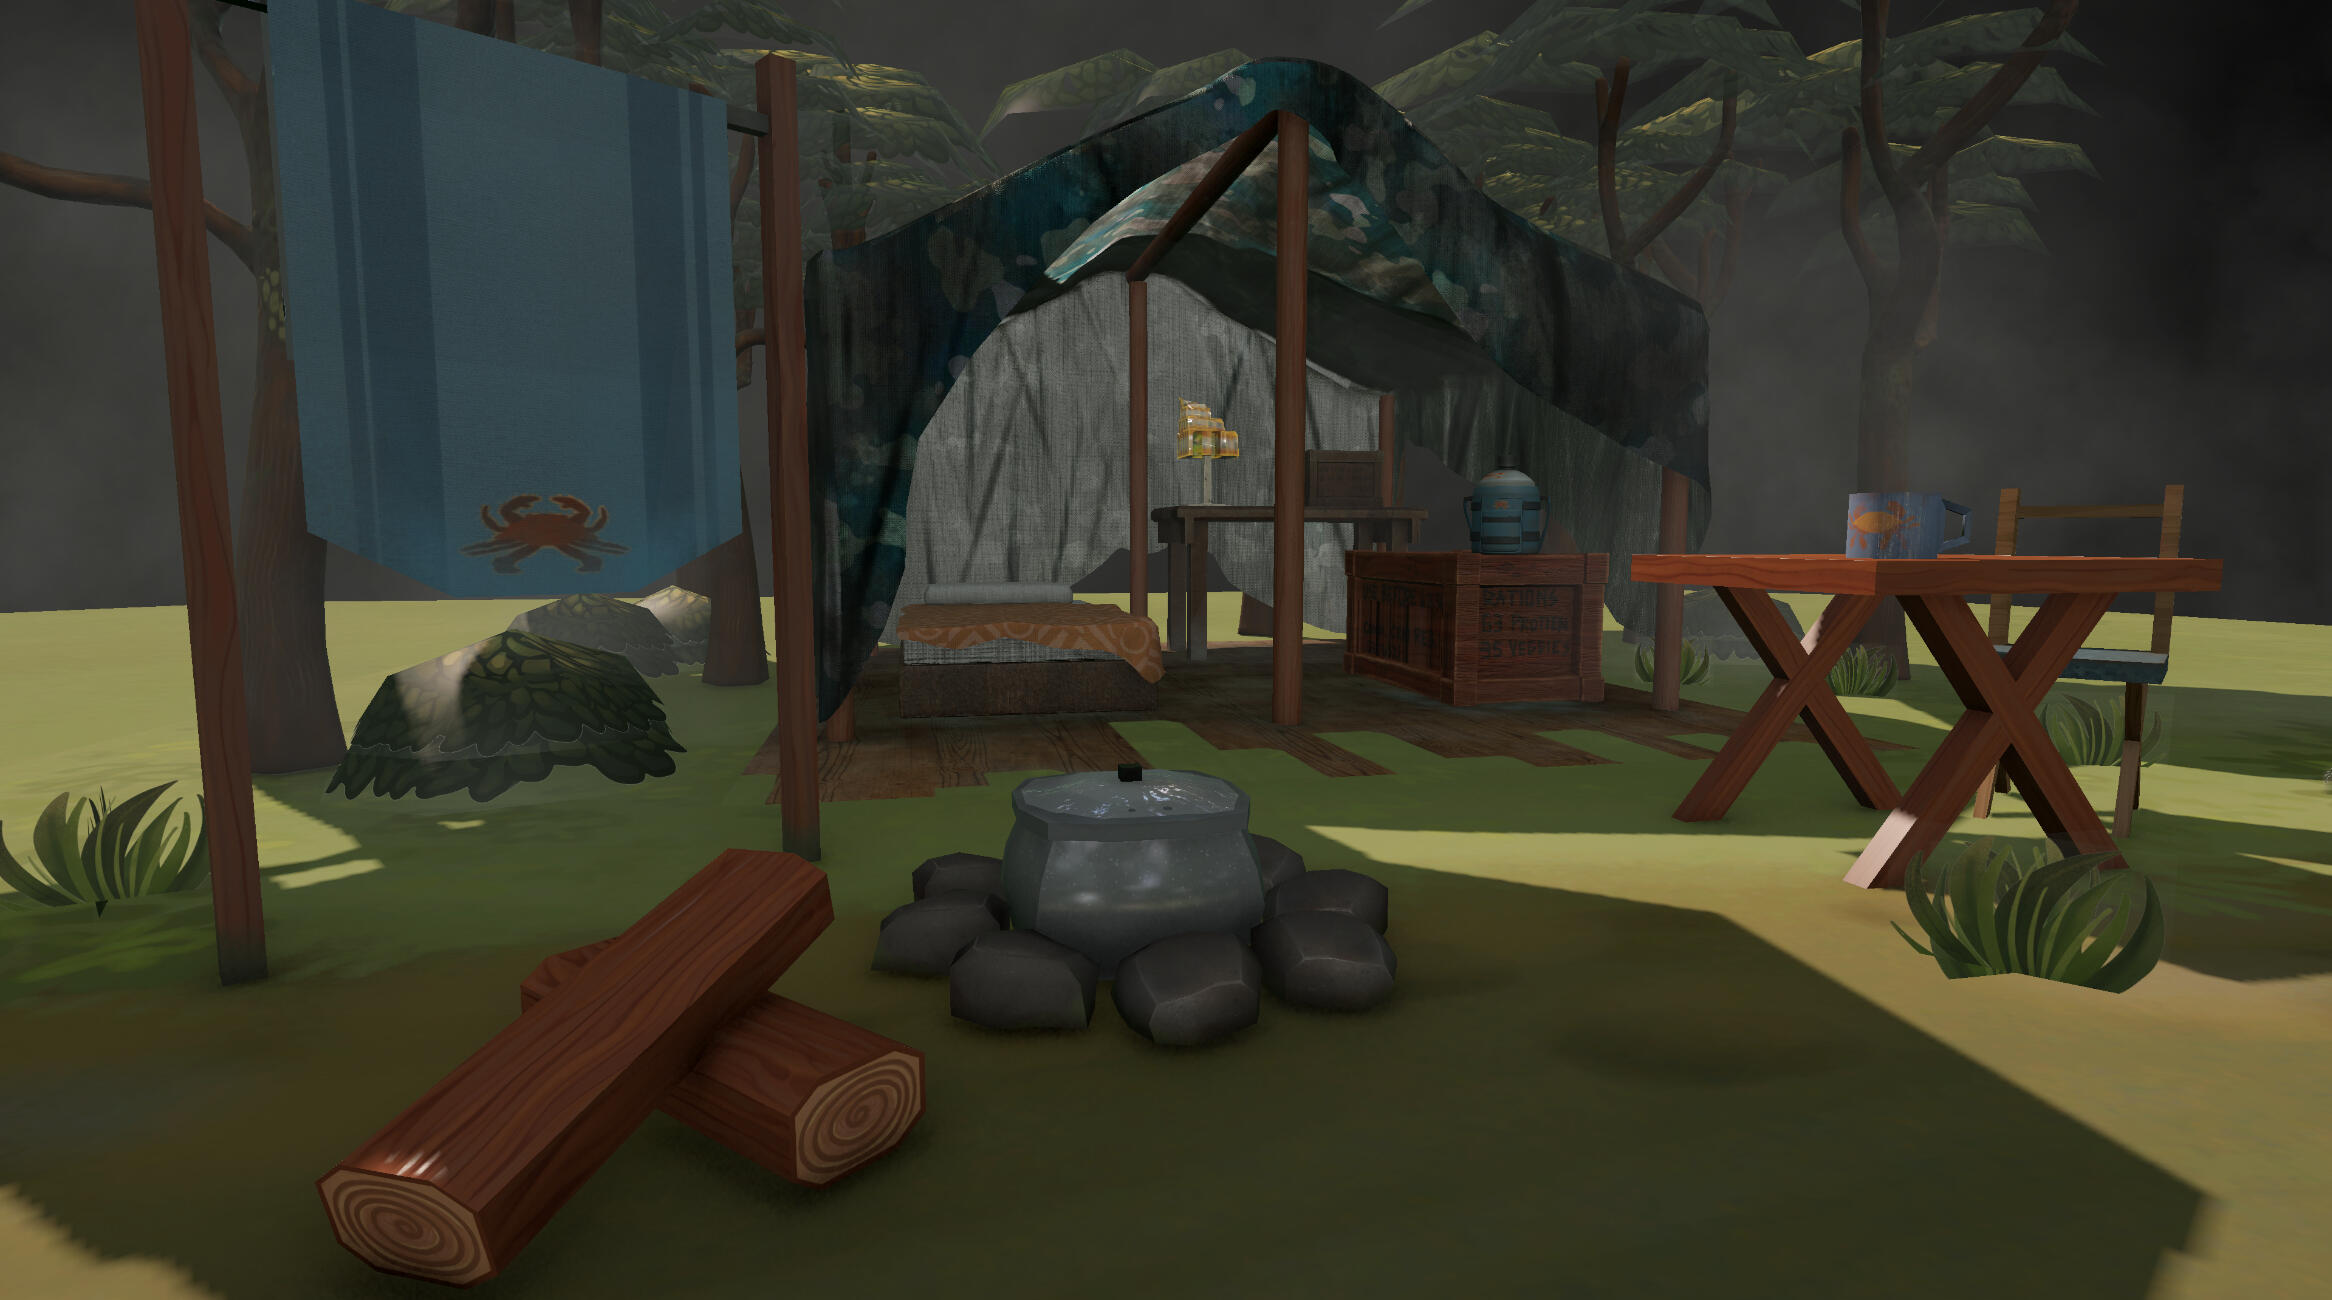
Environment
Programs Used: MAYA, PROCREATE, SUBSTANCE PAINTER

process
1. Gather References

2. Model new Props & UV unwrap in Maya

3. Texture Props in Procreate


4. Assemble & Light in Maya

I used Procreate's 3D capabilities for the first time in my game art career to create textures for the environment props in this scene. It was a bit confusing to learn how to correctly import the objects into Procreate, since it is still a mobile app and can't support hefty FBX files, but I would go on to love the experience and continue using the software for many more projects to come. I would also learn to use my UV space more effectively, grouping multiple objects together instead of using an entire 2k texture file for one item. Additionally, at this point in the semester, I would realize that color spaces were negatively affecting my renders, since they were set to sRBG instead of the correct ACEScg profile. It was a tedious, but worthwhile fix, to go through all my old image files and set them to the correct color space.
april 2025 - project 5
Game VFX
Programs Used: UNITY 6

process
Gather references.
Import to Unity.
Create fog using particle effects.
Assemble scene & create renders in Unity.
Importing my scene into Unity proved to be very easy, with me simply having to drag and drop materials instead of manually attaching nodes together in a shading graph. It didn't seem to like my transparent Arnold Standard Shaders, though, instead making the transparent bits still slightly visible. I tried other shaders, but none of them looked quite right, so I settled to keep the Arnold one. As for the fog itself, I learned Unity particle effects for the first time through this YouTube tutorial. Fog turned out to be a simple effect, which worked for my very busy schedule at this point in the semester.
april 2025 - project 6
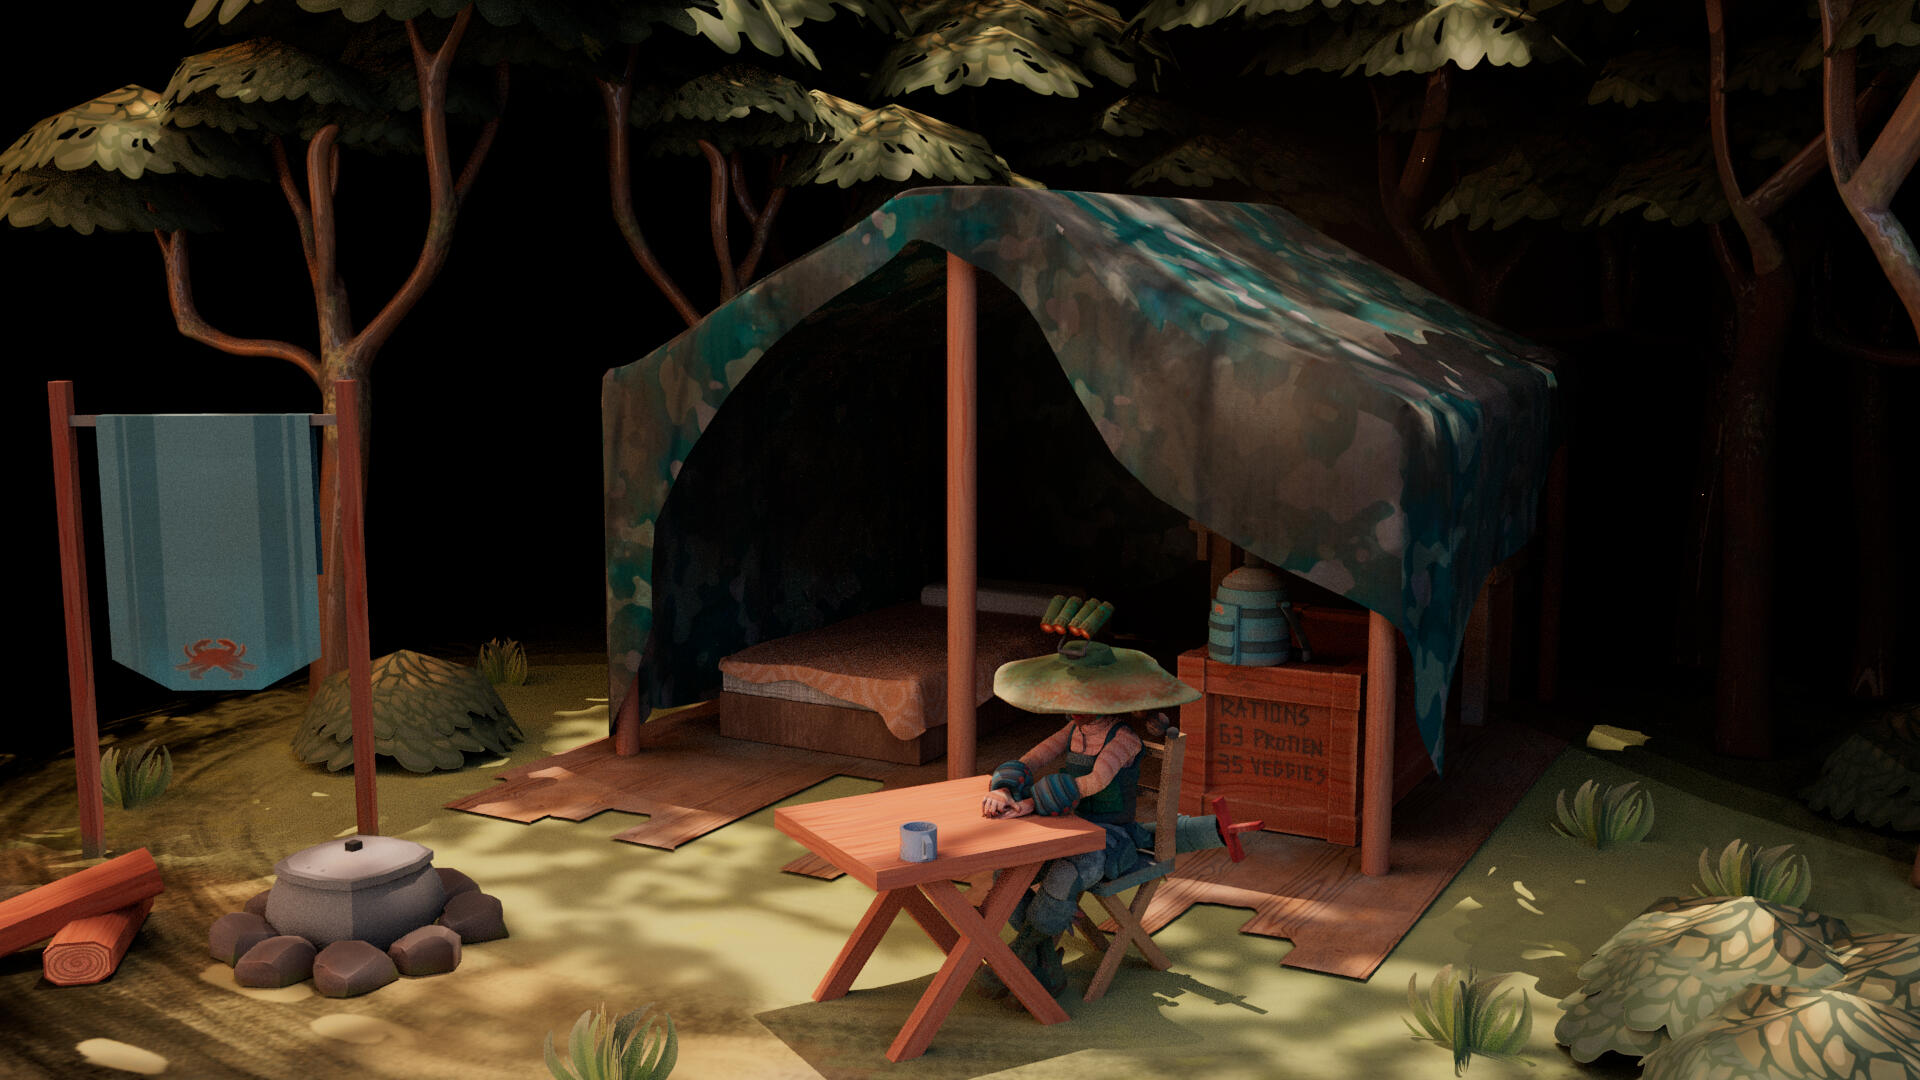
Final Diorama
Programs Used: MAYA, PROCREATE, SUBSTANCE PAINTER

process
Gather references.
Remaster some textures in Procreate, bake in Substance Painter.
Import character model and pose.
Set up gobo light and Ai Atmosphere.
Assemble scene & create renders in Maya.
Most of this "project" was simply refinement and lighting. I enjoyed learning about gobo lights because they really added to the forest-y mood of my scene. I also wanted to add a fade-into-black foggy effect, but I couldn't add both AiFog and AiAtmosphere; so, I just made semi-transparent black planes and staggered them to create a faux-fog effect. I also kept having specular issues with the interior lamp, though, which I couldn't end up fixing due to the low performance capabilities of both my own laptop and the computers in the lab. Despite such issues, though, it is gratifying to see the whole scene come together, especially with the inclusion of my posed 3D character from another class I took this semester.
september 2024 - project 1
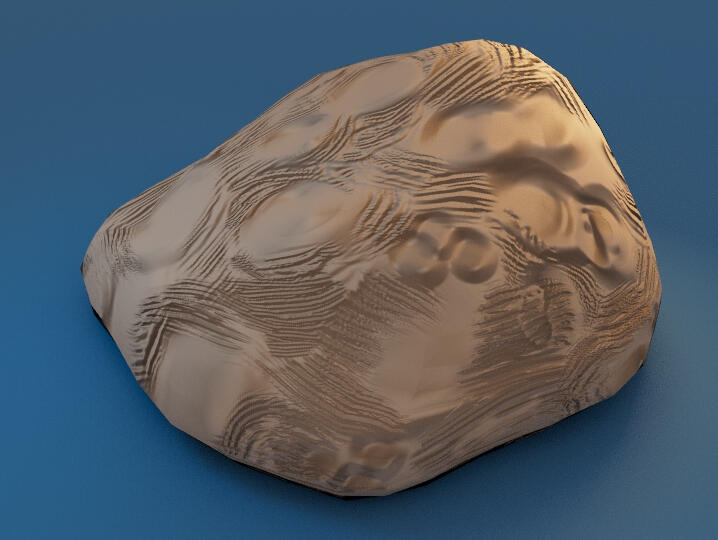
Environment Prop : Rocks
Programs Used: MAYA, MUDBOX


process
Gather references.
Sculpt first rock entirely in Mudbox.
Model second rock in Maya.
Sculpt second rock in Mudbox from base model.
Export and apply displacement & normal maps to Maya model.
Assemble scene & create renders in Maya.
This project was my first introduction to digital sculpting, as I had only ever modeled before. As I was more used to the rigid nature of polygons, I found sculpting to have a bit of a steep learning curve. As I learned more about the different brushes and texturing, though, I began to enjoy it.
I especially liked the workflow of the second rock, because I found it easier to work from a model I had created over a default Mudbox sphere. As I moved between software, I began to understand the limits of displacement mapping; I had sculpted deep crevices in Mudbox, but these did not transfer well into Maya.
september 2024 - project 2
Prehistoric Animal : Anomalocaris
Programs Used: ZBRUSH

process
Gather references.
Import pre-existing base mesh to ZBrush.
Sculpt in ZBrush.
Paint on existing UVs in ZBrush.
Going into this project, I felt like I had more of a handle on 3D sculpting as a medium, even though we were switching to yet again another new software. I almost completely disregarded the fish base model as I worked, a choice that would burden me with strange artifacts down the road. I think the part I am most proud of with this model is the painting, which I did on a Polypaint layer. The model itself does not really pull off the creature's anatomy. By the end of this project, though, I learned a lot about how to navigate ZBrush.
october 2024 - project 3
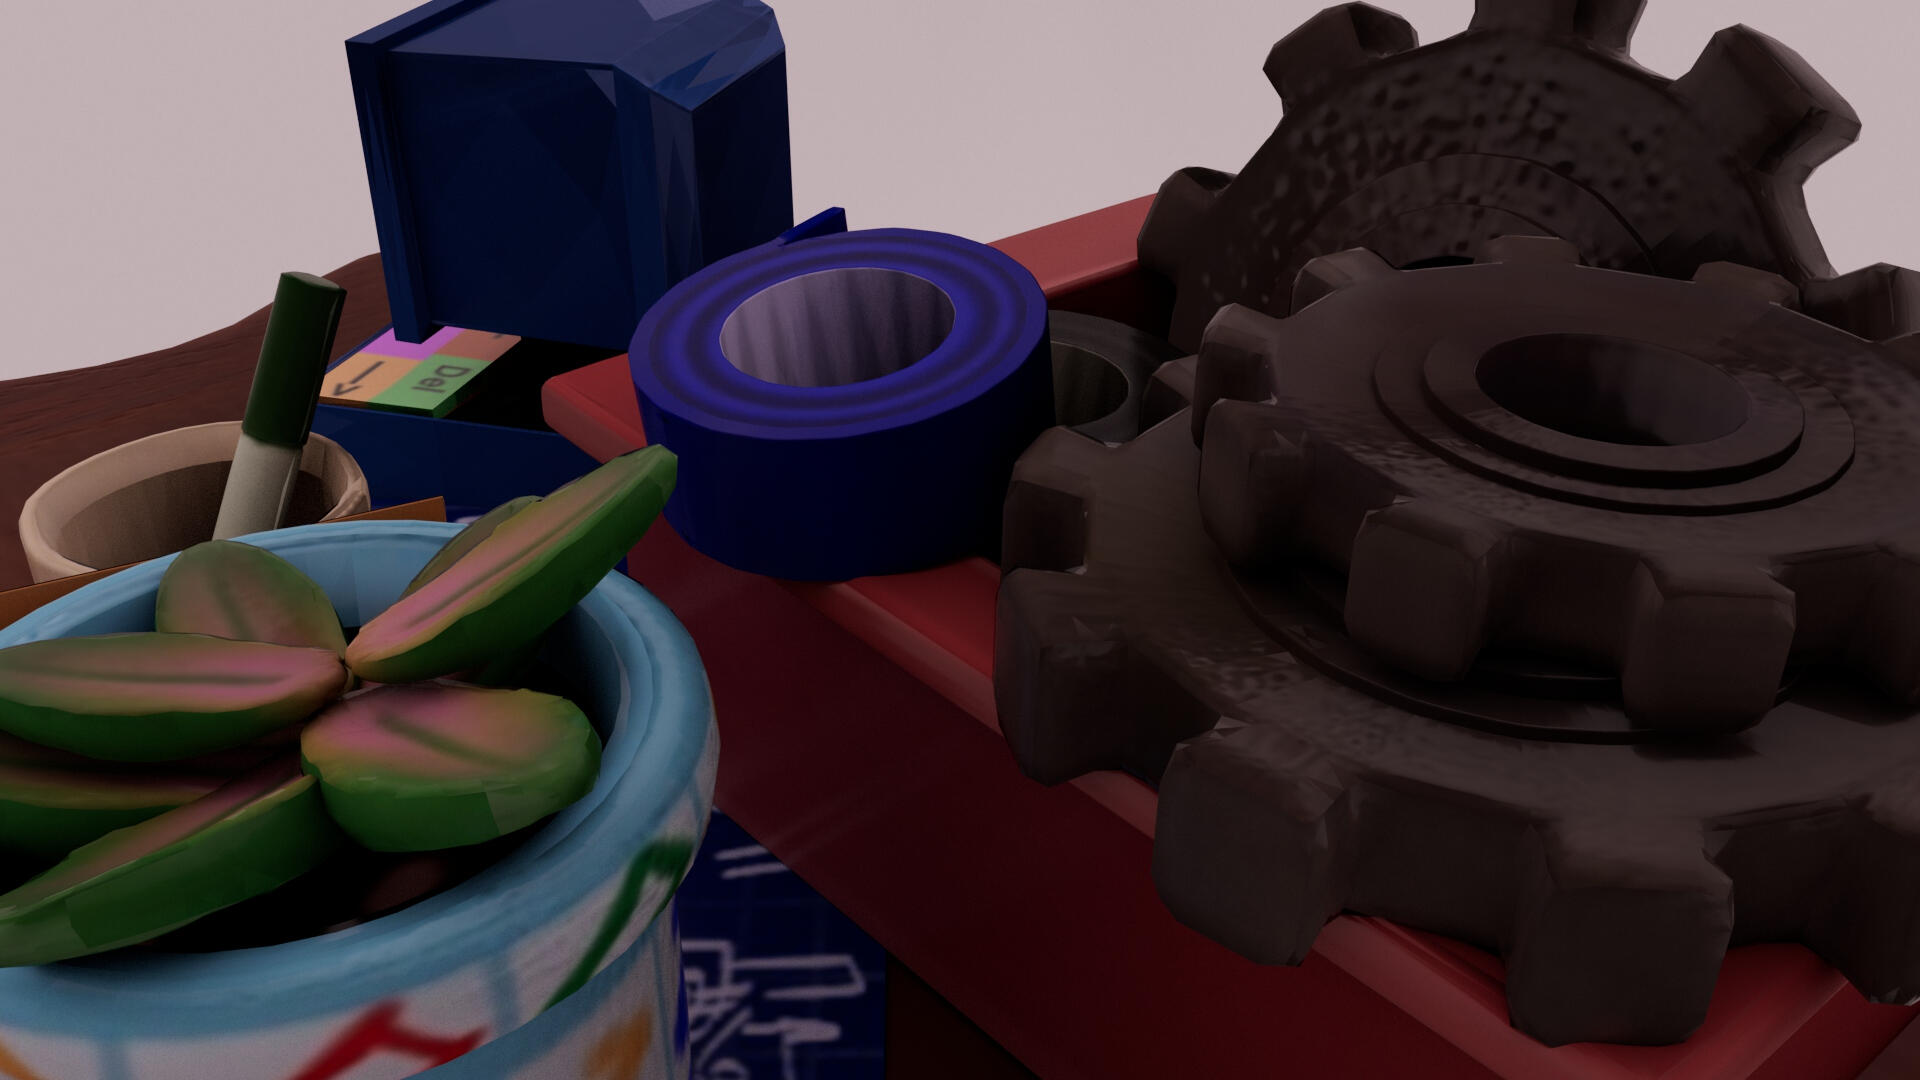
Environment Asset : Jay's Desk
Programs Used: MAYA, ZBRUSH, PROCREATE

process
1. Gather References / Create Concept Art

2. Base Model in Maya


This model was a little complex for the scope of the project, so I scaled down:

3. Sculpt in ZBrush

4. UV Unwrap & Texturing in Procreate

5. Assembling & Lighting in Maya

Before this project, I had only really done UV projection mapping. There are a few spots with wonky textures because of bad UVs or too few divisions. I wish that I had also thought to apply material properties outside of just color to give the objects more differentiation. Overall, though, I think my first go-around with texturing on a UV map could've gone worse.
My favorite part of this project was delving into character design through the means of a still life, as this desk is meant to belong to my character Jay from my game Heartlines.
october 2024 - project 4
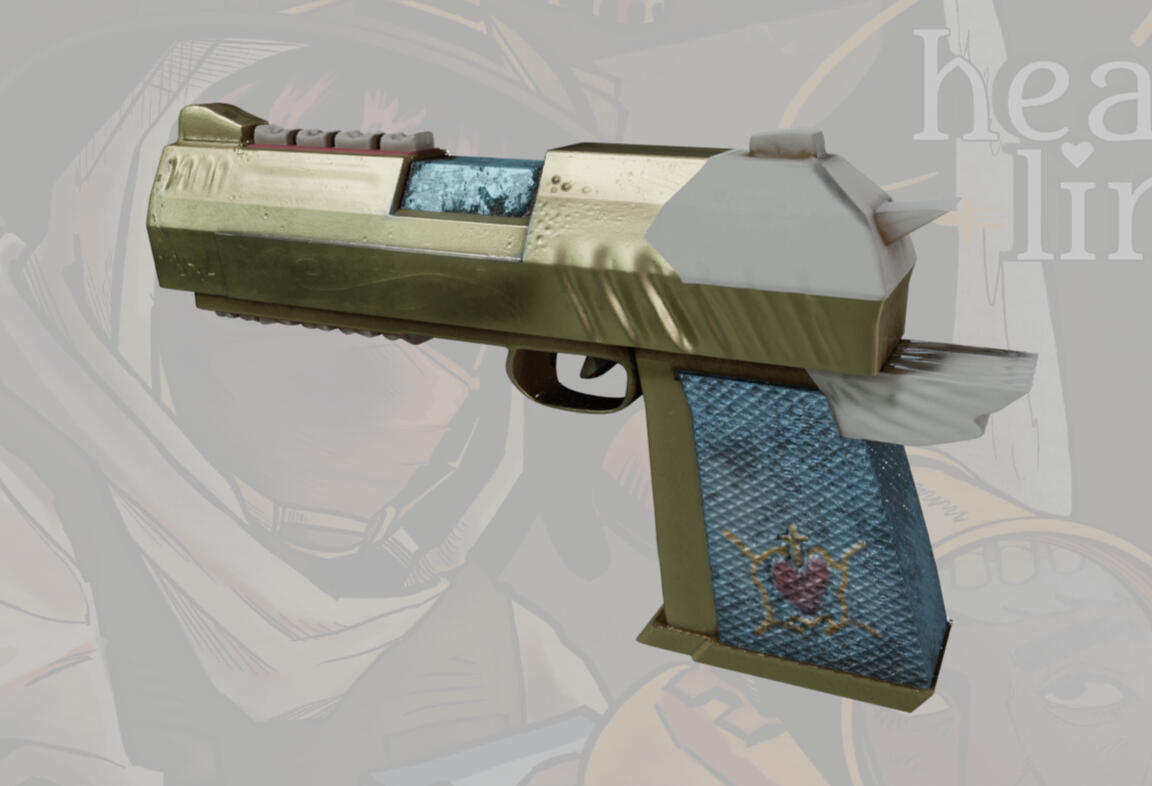
Prop Model : Ashley's Sidearm
Programs Used: MAYA, ZBRUSH, ADOBE SUBSTANCE PAINTER, MARMOSET

process
1. Gather References / Create Concept Art


2. Low Poly Base Model in Maya
3. Sculpting in ZBrush

4. Texturing in Substance Painter

5. Render in Marmoset

After the previous project, I knew I wanted to do another experimentation with character design. This gun belongs to my character Aempyriel (A.K.A. Ashley) from Heartlines, who is a fallen angel. The world of Heartlines concerns itself with travel across time, so I wanted this weapon to include mechanisms from guns across multiple eras. For example, the Desert Eagle is combined with the carvings of an 1880s revolver.
From a technical lens, I once again had to learn the limits of normal and displacement maps. On the bright side, though, I feel the UV unwrap was successful and I am mostly happy with the Substance Painter textures. I was overjoyed to learn about Marmoset, which saved me so much rendering time.
november 2024 - project 5
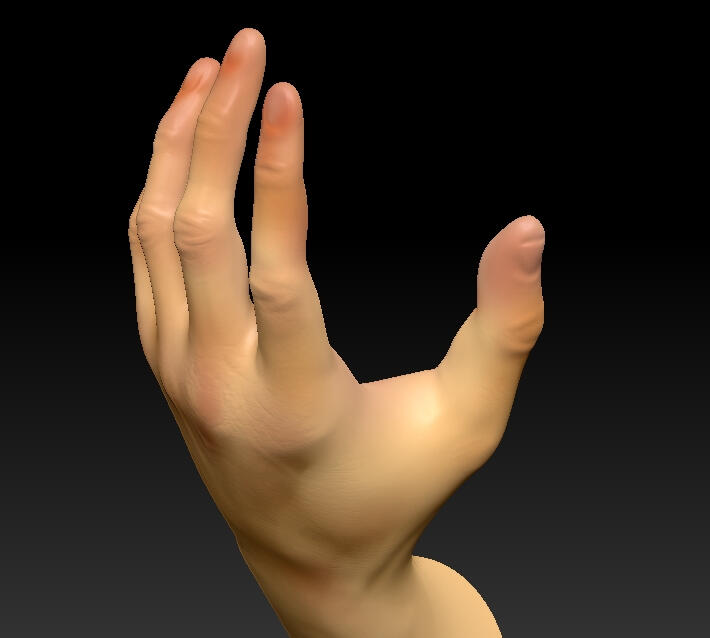
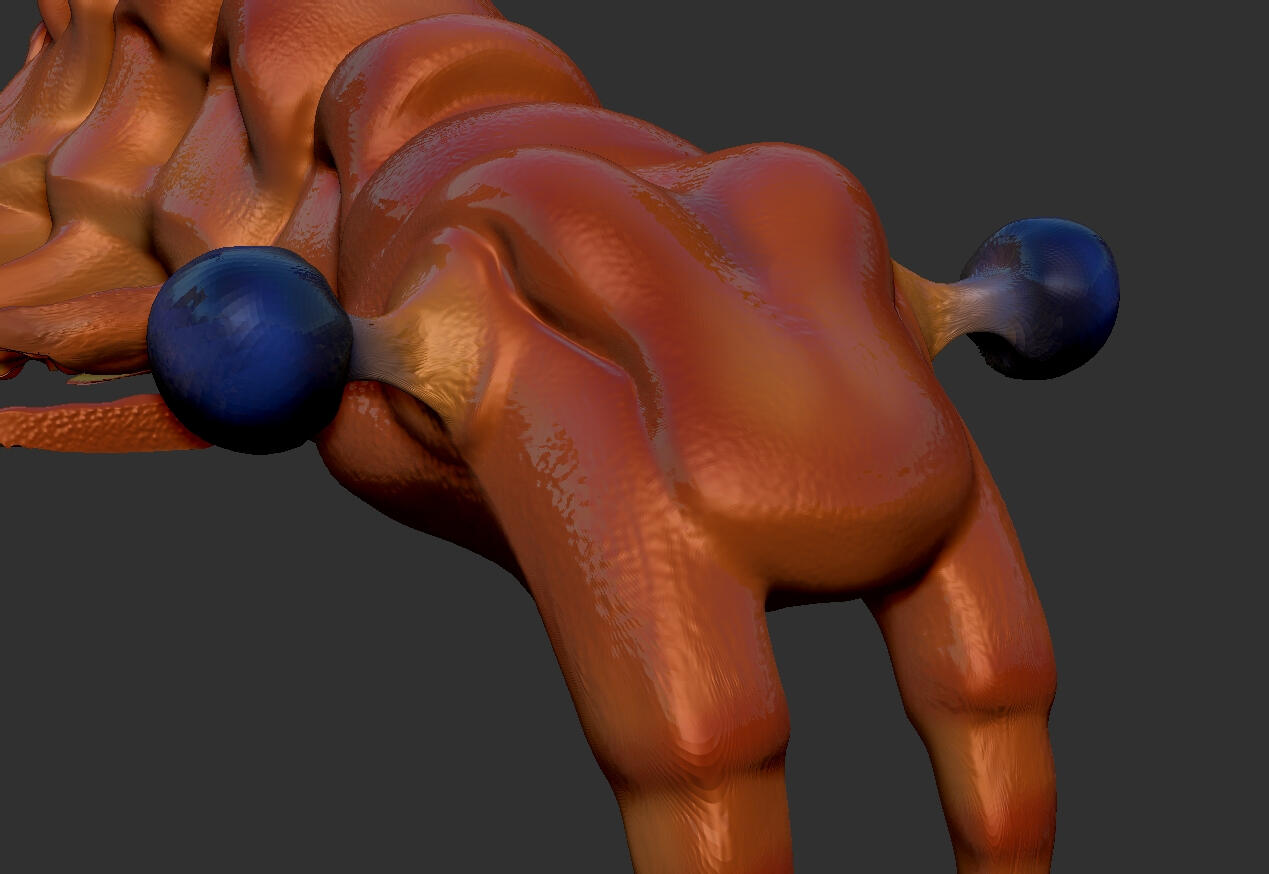
Anatomical Study : Hand
Programs Used: ZBRUSH

process
Gather references & research anatomy.
Import pre-existing base mesh to ZBrush.
Sculpt & paint in ZBrush.
I found researching anatomy to be useful, as I had a general idea of what hands are like, but the placement of veins was something I hadn't really thought about before. I found the sculpting to be pretty straightforward, though I did learn masking so that I could shorten the pre-existing model's long phalanges. Skin is my favorite thing to paint, so I had some fun with that.
november 2024 - project 6
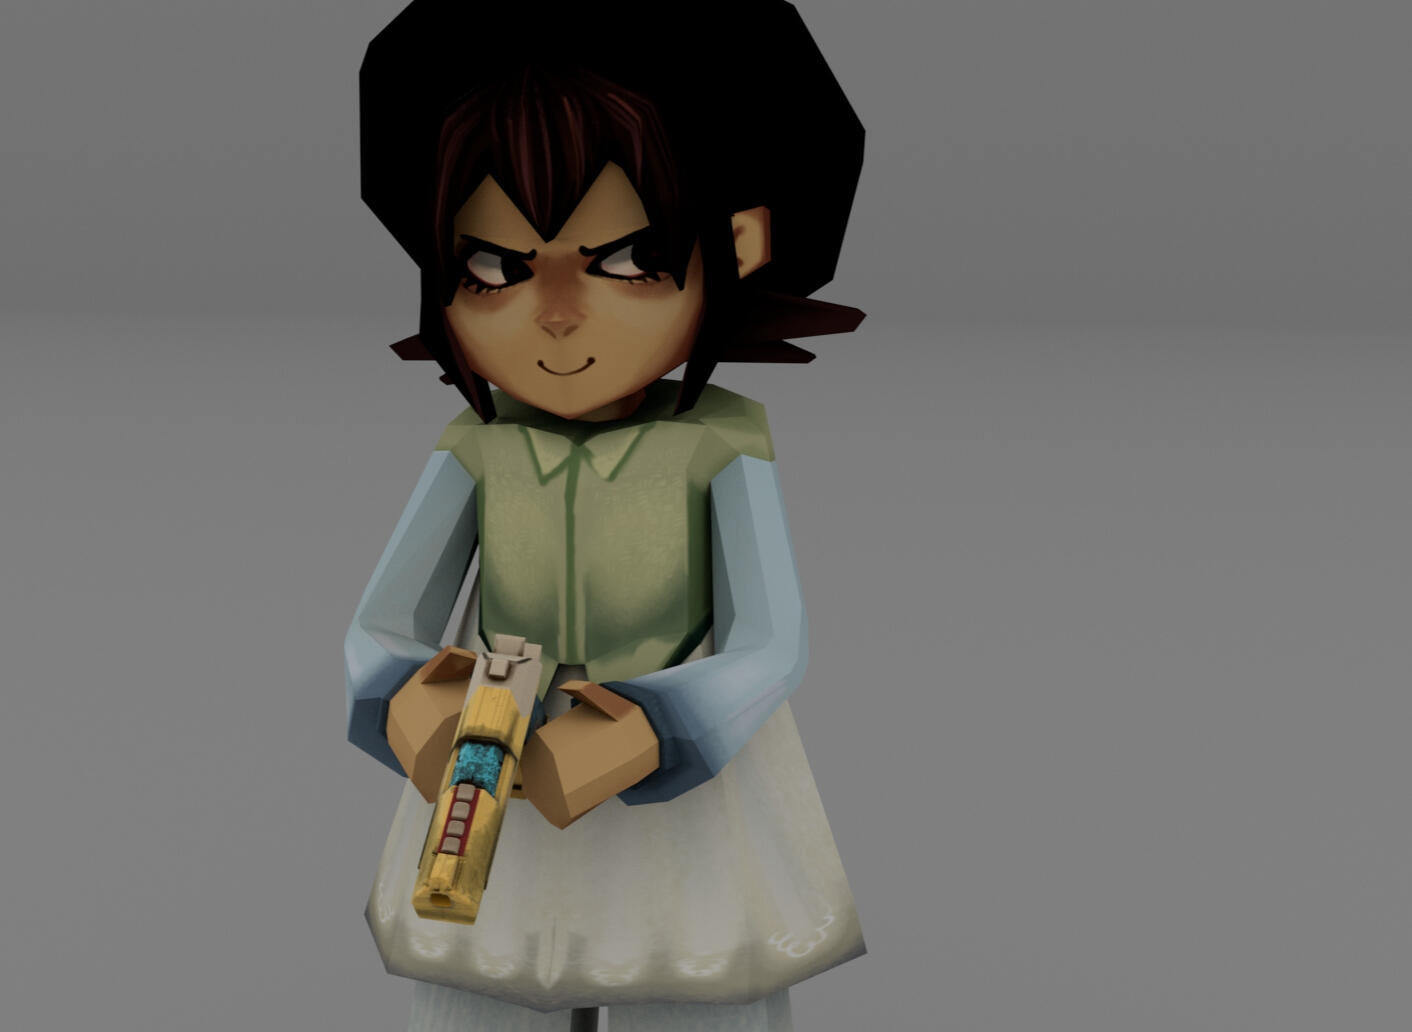
Final Project : Ashley Character Model
Programs Used: MAYA, PROCREATE

process
1. Gather References / Create Concept Art

2. Low Poly Model in Maya

3. Pose with Maya's Quick Rig

4. UV Unwrap & Procreate Texturing

5. Render in Maya

This project was one of those rare times where I executed the final project better than the concept I had imagined for it. I know I still have a lot to learn about efficient character modeling, but for my second time ever doing so, I am pleased with these results. I had a lot of fun trying to make the texturing packed with visual interest, although some smaller details did not really show up. I also found it very enjoyable to contextualize an earlier asset I had made with its rightful owner.